Set a standard hourly rate for each employee in your company, from shop floor crew to supervisors. Linarc uses these rates with the hours logged against each task in the daily records to work out labor costs for scheduled work items and each employee’s daily wages. Those wages then feed into your weekly or monthly payrolls, so you don’t have to calculate pay by hand.
The rate and burden you set here is the employee’s base wage values. When the employee works a shift or overtime tier that has a Rate Multiplier, Linarc multiplies both the base rate and the burden by that factor to calculate wages for those hours. For example, with a base rate of $21.00 and an Overtime 1 multiplier of 1.25, each Overtime 1 hour is paid at $26.25. To set multipliers, see Set Up Company Work Shifts and Overtime.
Use the links below to jump to the section you need help with:
- The Employee Rates screen
- Add or Update Wage Rates for Workers
- View Wage Rate Change History for a Worker
- Delete Base Wage Rate for a Worker
The Employee Rates Screen
Ensure you're in the 'Crew Hours' screen. If not,
- Click the logo at the top-left to return to your portfolio console if you are in a different module
- Click ‘Company’ at the top of the portfolio console.
- Click ‘Crew Hours’ on the left
- Select the 'Employee Rates' tab in the 'Crew Hours' screen
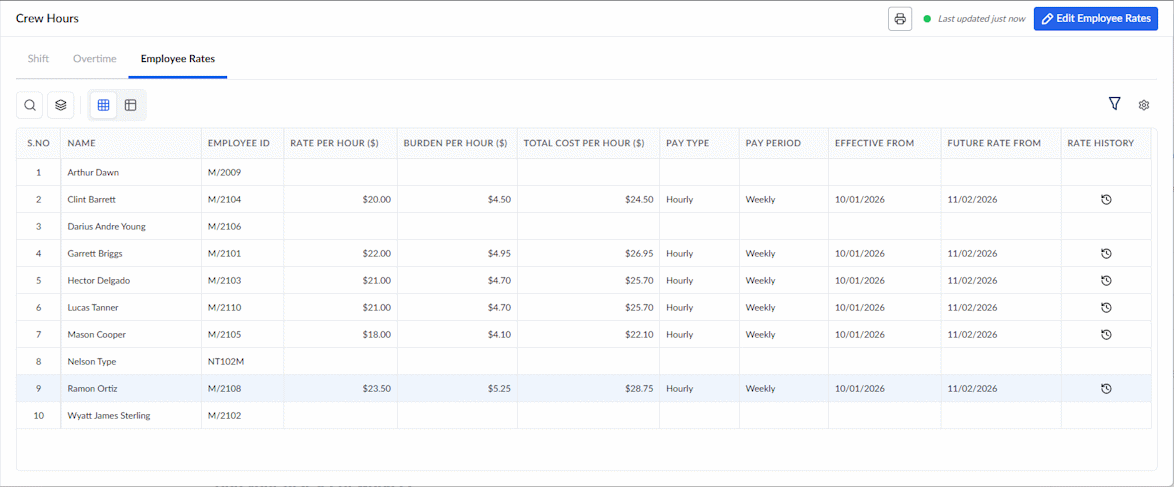
The 'Employee Rates' interface shows the list of shop workers enrolled in Linarc, with their details and the hourly base wage rates. All wages are in US dollars.
- Name - The employee’s full name.
- Employee ID - The unique ID of the employee, assigned by the company.
- Rate per Hour ($) - The base wage paid per hour, before any employer costs and before any shift or overtime Rate Multiplier is applied.
- Burden per Hour ($) - The extra hourly cost the employer pays on top of wages. That typically covers payroll taxes, workers’ comp, insurance, benefits and similar overhead.
- Total Cost per Hour ($) - The full hourly cost of the employee to the company: Rate + Burden. This is the figure used for labor costing on jobs.
- Pay Type - How the employee is paid, for example Hourly or Salary.
- Pay Period - How often the employee is paid, for example Weekly or Bi-weekly.
- Effective From - The date the current rate took effect.
- Future Rate From - The date a scheduled upcoming rate change takes effect.
- Rate History - The clock icon opens the log of the employee’s past rates and changes.
Search, Filter, and Sorting Options
- Click the magnifying glass icon and use the 'Search' box to find an entry using any value from the table as search criteria.
- Click any column header to sort the rows in ascending or descending order based on that column's data.
- Click the cog wheel icon at the top right to adjust the display density and customize the display and order of the columns. See Customize Columns in List Views.
- The options at the top left allow you to create nested groups of entries. See Group and Organize Items in a List View.
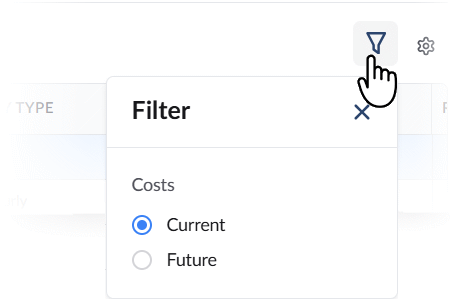
- Use the funnel icon at the top-right to switch between current rates and rates set for the future salary raises.
Click the ‘Print’ icon (printer) at the top right to print the current table or save it as a PDF. The output reflects the table as it is currently displayed, including any search, filters, grouping and column changes you have applied.
Add or Update Wage Rates for Workers
The 'Employee Rates' interface allows you to set up base wage rates for new employees and change or update the existing rates at any time. You can also set up raised rates and schedule them to take effect in the future. This is useful for making corrections or resetting rates after promotions, appraisals, experience-based increments, and more. The changes will take effect on the date you specify.
Current Rates
The process is similar for setting up rates for a new employee or editing existing rates for existing employees.
To set up current rates
- Click the serial number of the employee to open their 'Employee Details' pane on the right and ensure that the 'Current Rate' tab is open:
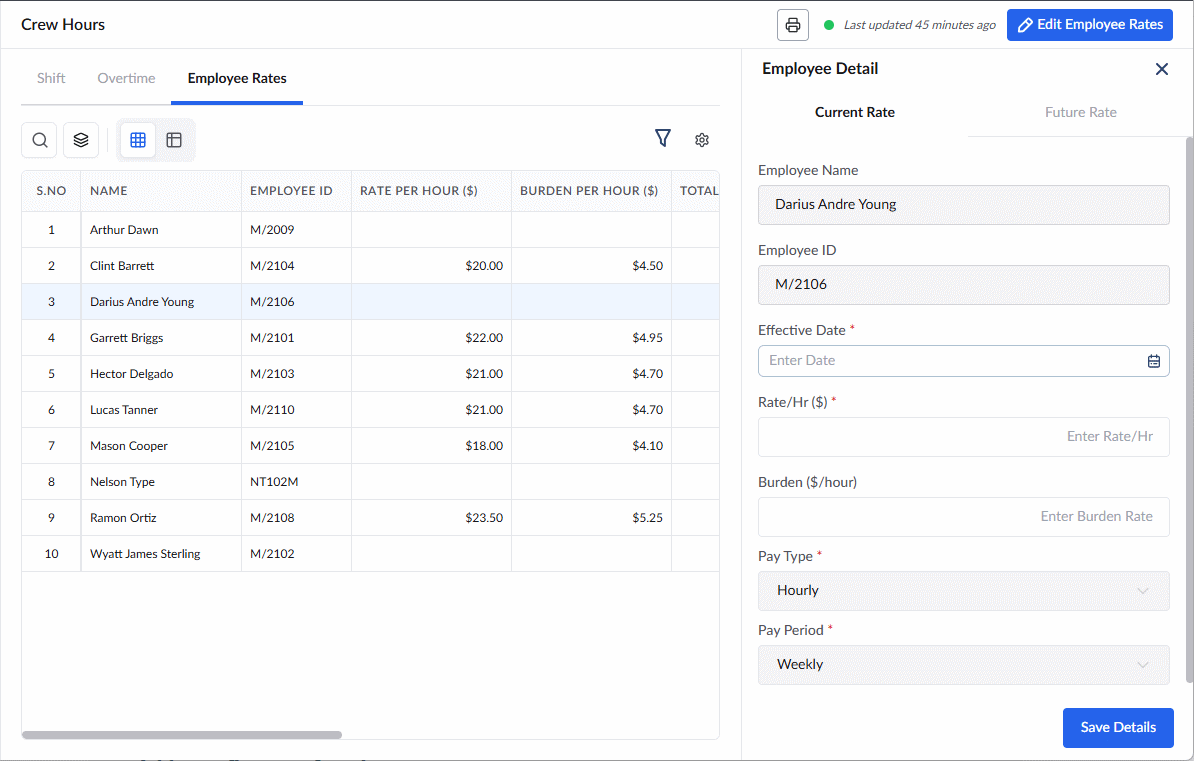
- Effective Date - Select the date from which the new rate should take effect, using the calendar.
- Rate/Hr and Burden - Enter the employee’s base wage rate and labor burden. Do not enter overtime or shift-adjusted rates. Linarc applies the Rate Multiplier for each shift or overtime tier automatically when it calculates wages.
- Verify the pay type and pay period values.
- Click 'Save Details'.
The dialog appears with a confirmation message depending on whether you are adding the rate for the first time for an employee or editing an existing value:
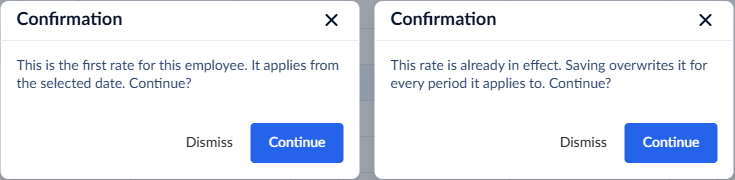
- Click 'Continue' to confirm your action.
Future Rates for Salary Revision
To set up a rate for future
- Click the serial number of the employee to open their 'Employee Details' pane on the right
- Select the 'Future Rate' tab
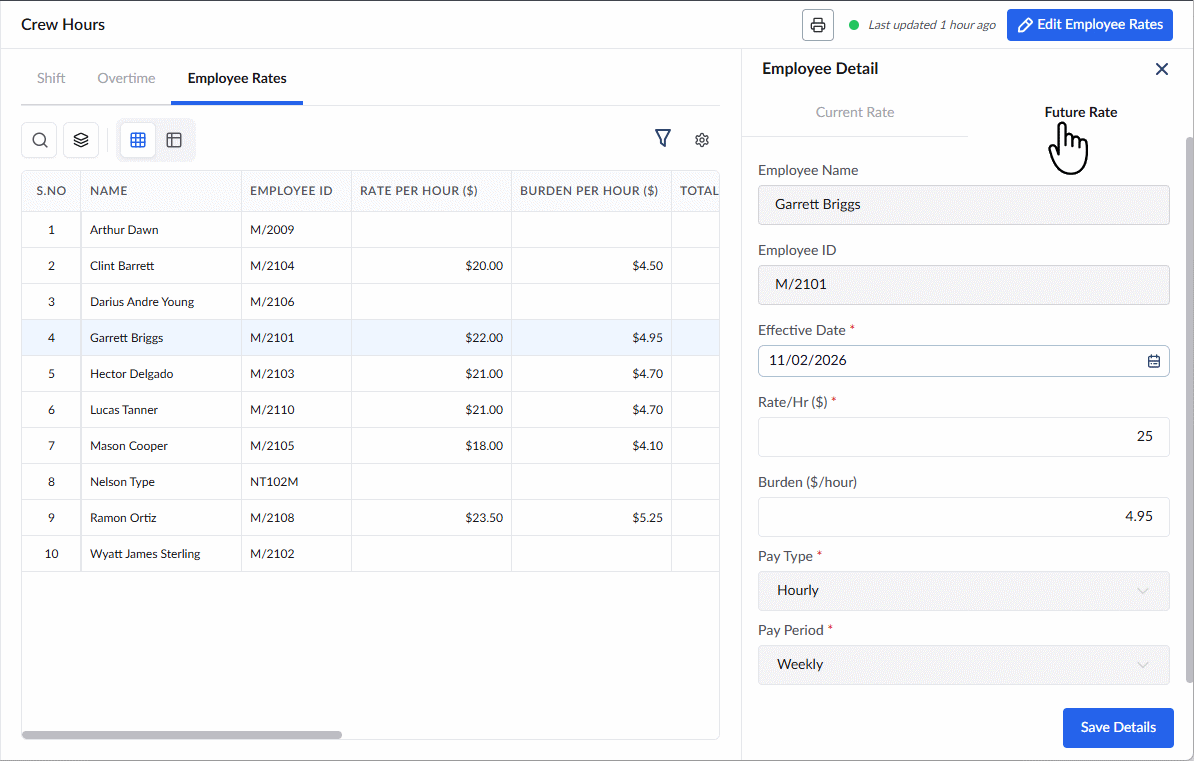
- Effective Date - Select the date from which the revision should take effect using the calendar.
- Rate/Hr and Burden - Enter the new base wage rate and labor burden. From the effective date, shift and overtime Rate Multipliers apply to this new base rate.
- Click 'Save Details.'
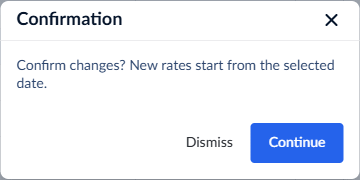
- Click 'Continue' to confirm your action.
View Wage Rate Changes History for a Worker
You can review the log of wage rate changes for an employee at anytime.
To view the wage revisions of an employee
- Click the clock icon in the 'Rate History' column of the employee.
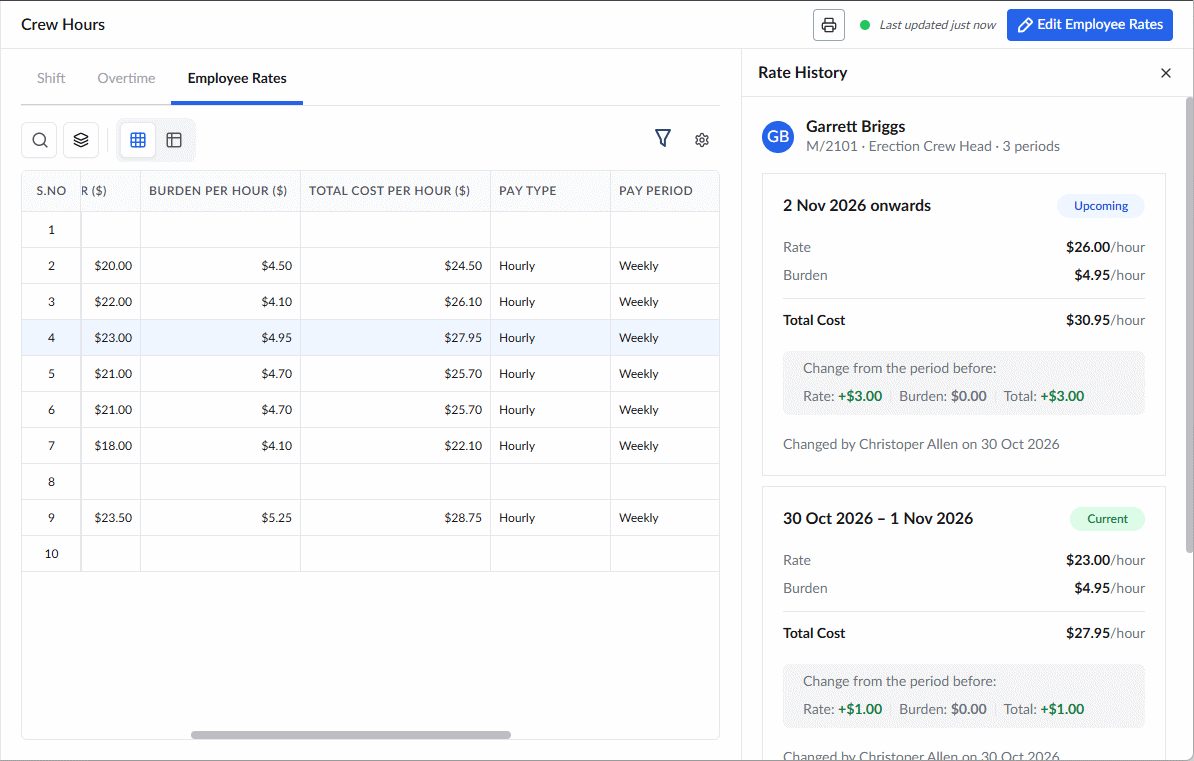
The right pane shows the log with each change as a card.
Delete Base Wage Rate for a Worker
You can completely remove the wage rate setup for any worker at any time. This is useful if you want to set entirely new values or the employee is suspended or terminated.
To remove the wage rates
- Click the serial number of the employee to open their 'Employee Details' pane on the right.
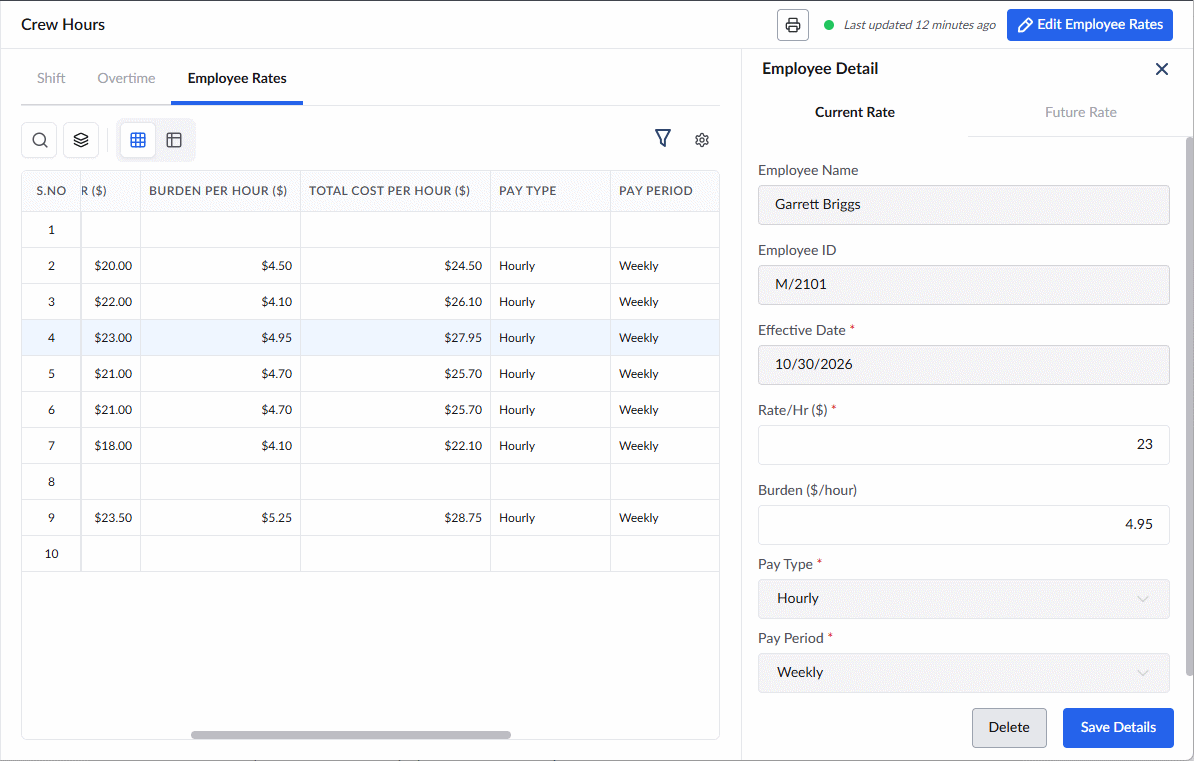
- Click the 'Delete' button in the right pane
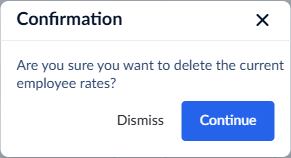
- Click 'Continue' to confirm your action.
Was this article helpful?
That’s Great!
Thank you for your feedback
Sorry! We couldn't be helpful
Thank you for your feedback
Feedback sent
We appreciate your effort and will try to fix the article