Keep a record of the vendors who supply materials, tools and services to your company. Each supplier entry stores the supplier's business category, point of contact, phone number, email and address, so your team can find the right vendor quickly and everyone works from the same details.
Use the links below to jump to the section you need help with:
The Suppliers screen
Ensure you're in the 'Suppliers' screen. If not,
- Click the logo at the top-left to return to your portfolio console if you are in a different module.
- Click 'Company' at the top of the portfolio console.
- Click 'Suppliers' on the left.
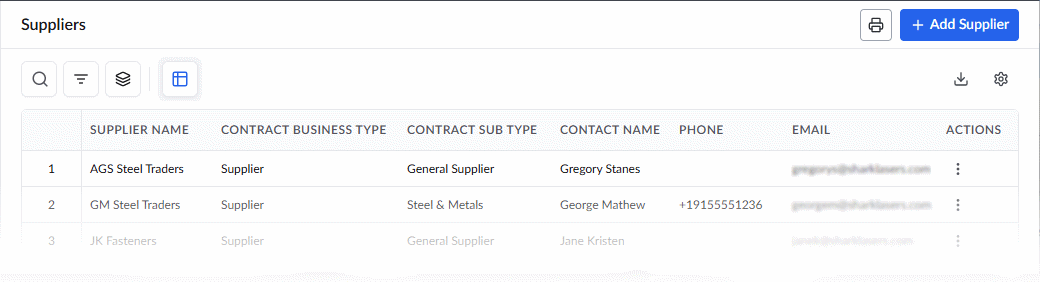
The 'Suppliers' screen lists all suppliers added to your company, with their details:
- Supplier Name – The name of the supplier's business.
- Contract Business Type – The business category of the supplier, for example Supplier or Vendor.
- Contract Sub Type – The specialty of the supplier within the business category, for example General Supplier or Steel & Metals.
- Contact Name – The person to contact at the supplier.
- Phone – The contact's phone number, shown with the country code.
- Email – The contact's email address.
- Actions – The three-dot menu at the end of each row that lets you edit or delete the supplier.
Suppliers Added Automatically from Estimates
Not every supplier in this list is added manually. When you upload an estimate while bidding for a new project, and its material rows include suppliers that are not yet in this directory, Linarc adds those suppliers to the list automatically after the project manager who uploads the estimate confirms.
These suppliers appear in the list like any other supplier. Details such as the contact person, phone number and email address are taken from the estimate. You can update these details by selecting 'Edit' from the 'Actions' menu. See Edit a Supplier below.
Search, Filter, and Sorting Options
- Click the magnifying glass icon and use the 'Search' box to find a supplier using any value from the table as the search criteria.
- Click any column header to sort the table in ascending or descending order based on that column's data.
- Click the funnel icon to filter the list. See Filter Options in List Views.
- Click the layers icon to create nested groups of entries. See Group and Organize Items in a List View.
- Click the cog wheel icon at the top right to adjust the display density and to customize the display and order of the columns. See Customize Columns in List Views.
- Use the options at the top left to manage custom views of the table. See Manage Custom List Views.
Add a Supplier
To add a new supplier
- Ensure you're in the 'Suppliers' screen.
- Click 'Add Supplier' at the top right to open the 'Add Supplier' window.
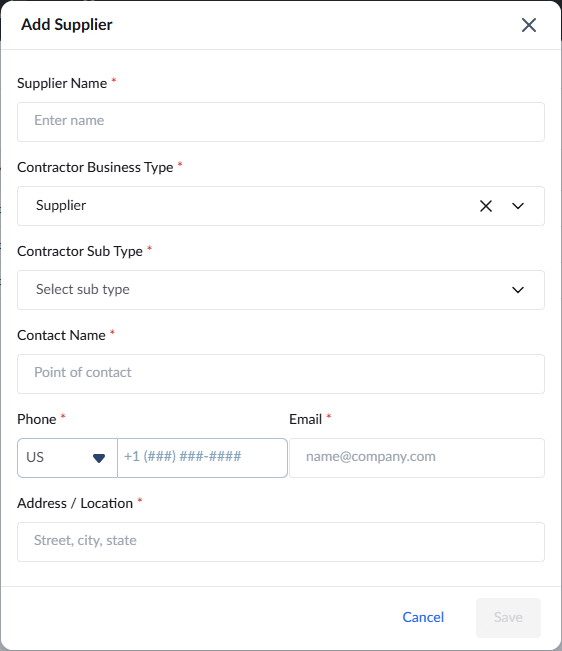
- Enter or select the details. All fields marked with an asterisk (*) are required:
Supplier Name – Enter the name of the supplier's business.
Contractor Business Type – Select the business category from the list. Choose 'Supplier' for vendors who provide materials, tools or services.
Contractor Sub Type – Select the supplier's specialty. This list appears after you choose a business type and shows only the sub types for that type. Scroll the list to see all options, for example General Supplier, Building Materials, Lumber & Millwork, Steel & Metals, Rebar & Reinforcement, Ready-Mix Concrete, Tools & Consumables, Safety & Site Supplies and Waste & Disposal.
Contact Name – Enter the name of the person to contact at the supplier.
Phone – Select the country code (US by default), then enter the phone number.
Email – Enter the contact's email address.
Address / Location – Enter the supplier's street, city and state, for example San Diego, CA.
- Click 'Save'.
Edit a Supplier
You can update the details of an existing supplier at any time, for example when a contact person, phone number or address changes.
To edit a supplier
- Ensure you're in the 'Suppliers' screen.
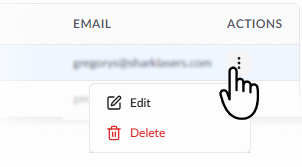
- Click the three-dot icon in the 'Actions' column of the supplier and select 'Edit'. The 'Edit Supplier' window opens with the supplier's current details.
- Update the details as needed. The fields are the same as those in Add a Supplier above, and all fields marked with an asterisk (*) are required.
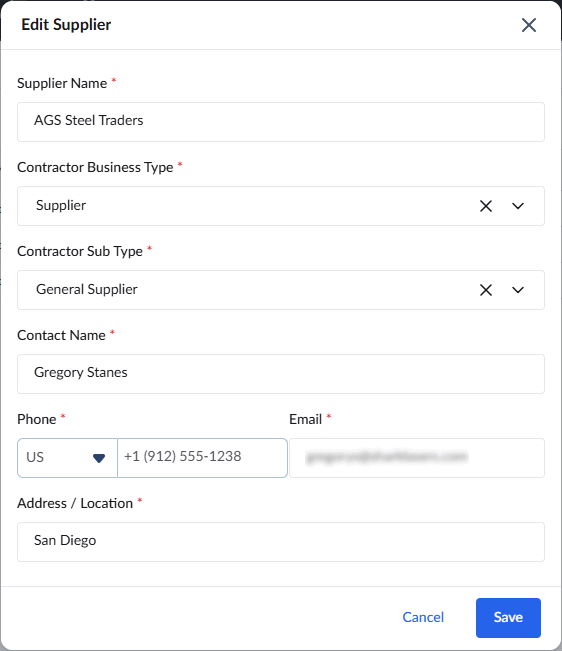
- Click 'Save'.
The list shows the updated details.
Delete a Supplier
You can remove a supplier from the list, for example when your company no longer works with them or the entry was added by mistake.
To delete a supplier
- Ensure you're in the 'Suppliers' screen.
- Click the three-dot icon in the 'Actions' column of the supplier and select 'Delete'.
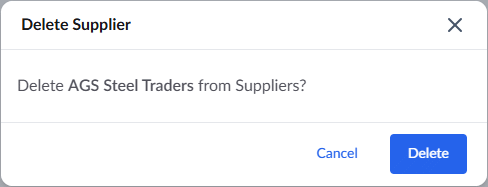
- In the confirmation window, click 'Delete'.
Was this article helpful?
That’s Great!
Thank you for your feedback
Sorry! We couldn't be helpful
Thank you for your feedback
Feedback sent
We appreciate your effort and will try to fix the article